Rugby 2v1 Explainer – Motion Design Meets Coaching
Project Type: Passion Project
Direction: Simon Tibbs
My Role: Concept, design and animation
Combining my passions of rugby and motion graphic design, I created this self-initiated animation to help young players understand how to execute a successful 2v1 scenario on the pitch. As a coach for my son’s mini rugby team, I wanted to build a visual learning tool that goes beyond whiteboard explanations. The goal was to demonstrate, with clarity and energy, how manipulating defenders can create space for teammates, something even beginners can grasp quickly when presented in the right way.
The focus was on testing how minimal motion, clear hierarchy and timing can help explain decision-making without relying on commentary or instruction-heavy overlays.
UV Unwrapping in Cinema 4D
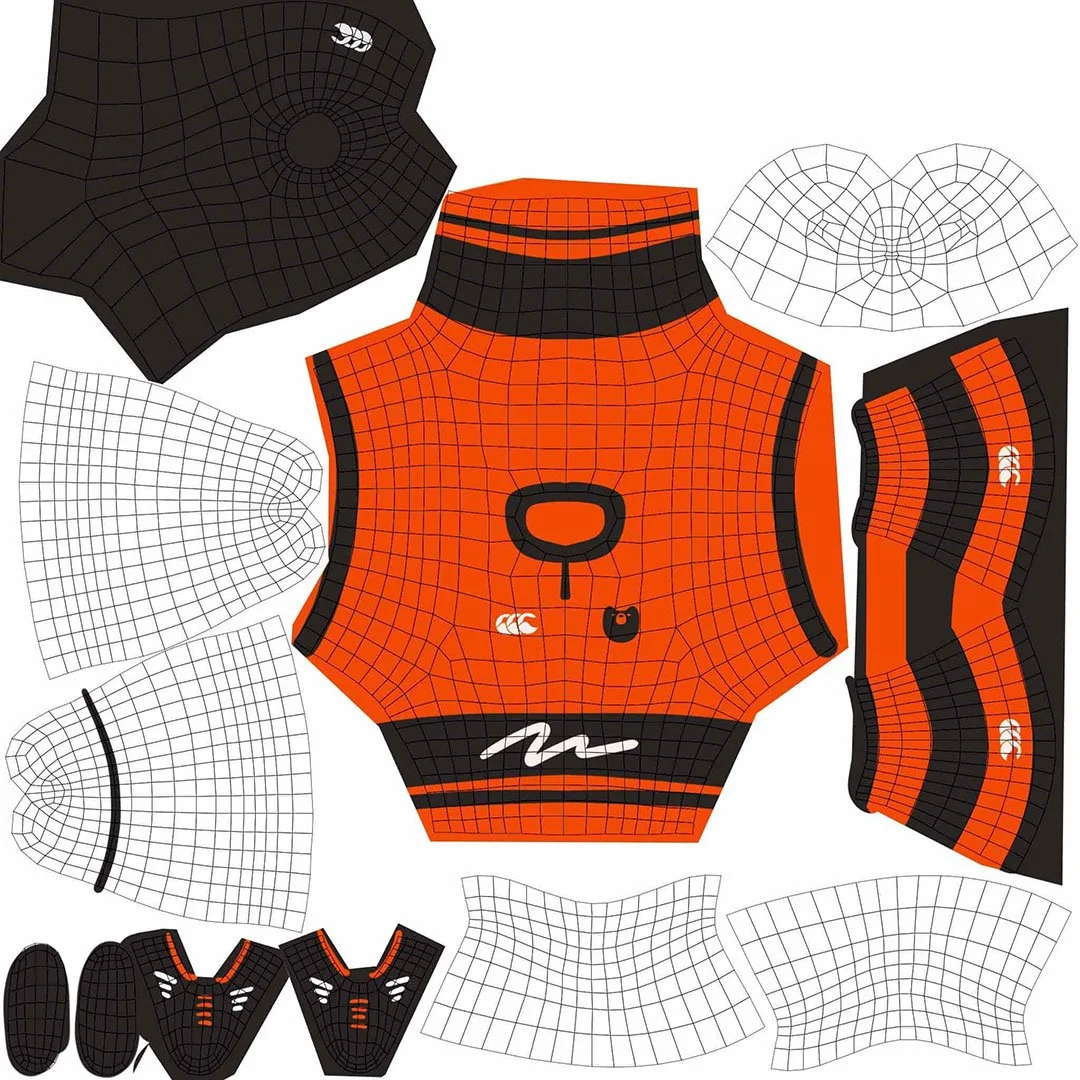
To bring the 3D characters to life, I needed to create detailed, textured surfaces that matched the stylized design. This required UV unwrapping, which is a crucial step in texturing 3D models accurately.
UV unwrapping is the process of flattening a 3D model into a 2D map, allowing textures and artwork to be applied precisely. Think of it like unfolding a cardboard box into a single sheet before decorating it.
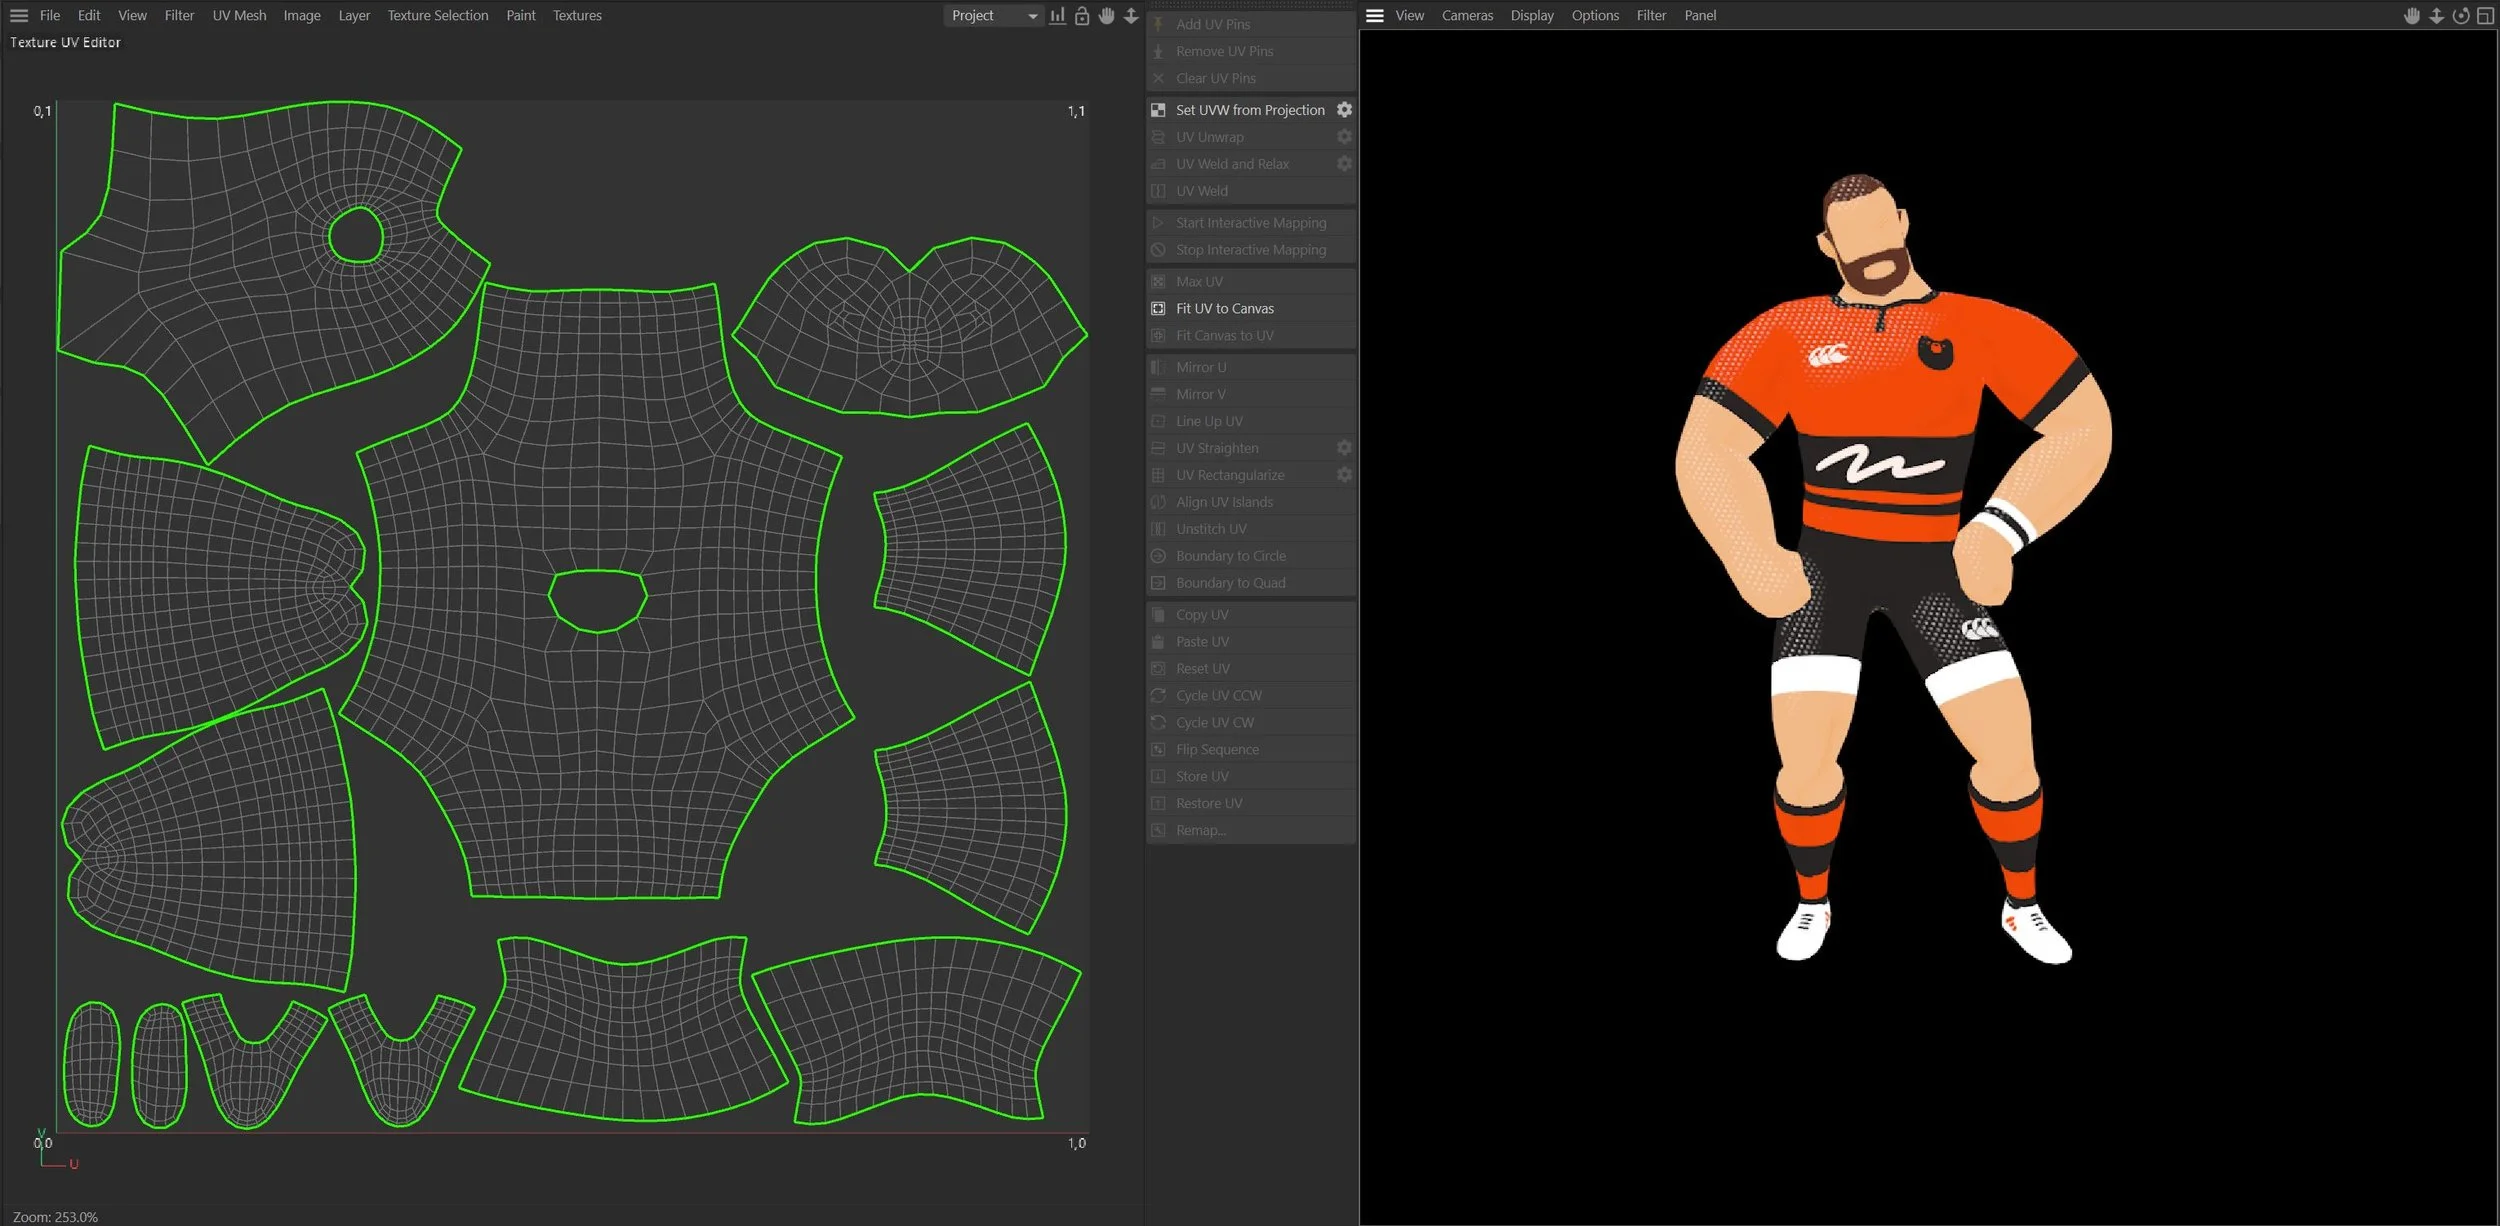
Here’s how you do it in Cinema 4d.
✅ Step 1: Unwrapped the character model’s mesh (above) to create a seamless texture layout.
✅ Step 2: Used UV mapping tools in Cinema 4D to prevent stretching and distortion.
✅ Step 3: Applied textures in Photoshop directly onto the unwrapped 2D map to ensure clean and crisp surface details.
✅ Step 4: Rewrapped the UV map back onto the 3D model, making sure colours and patterns aligned correctly.